

Mr. Oldskool Creation
-
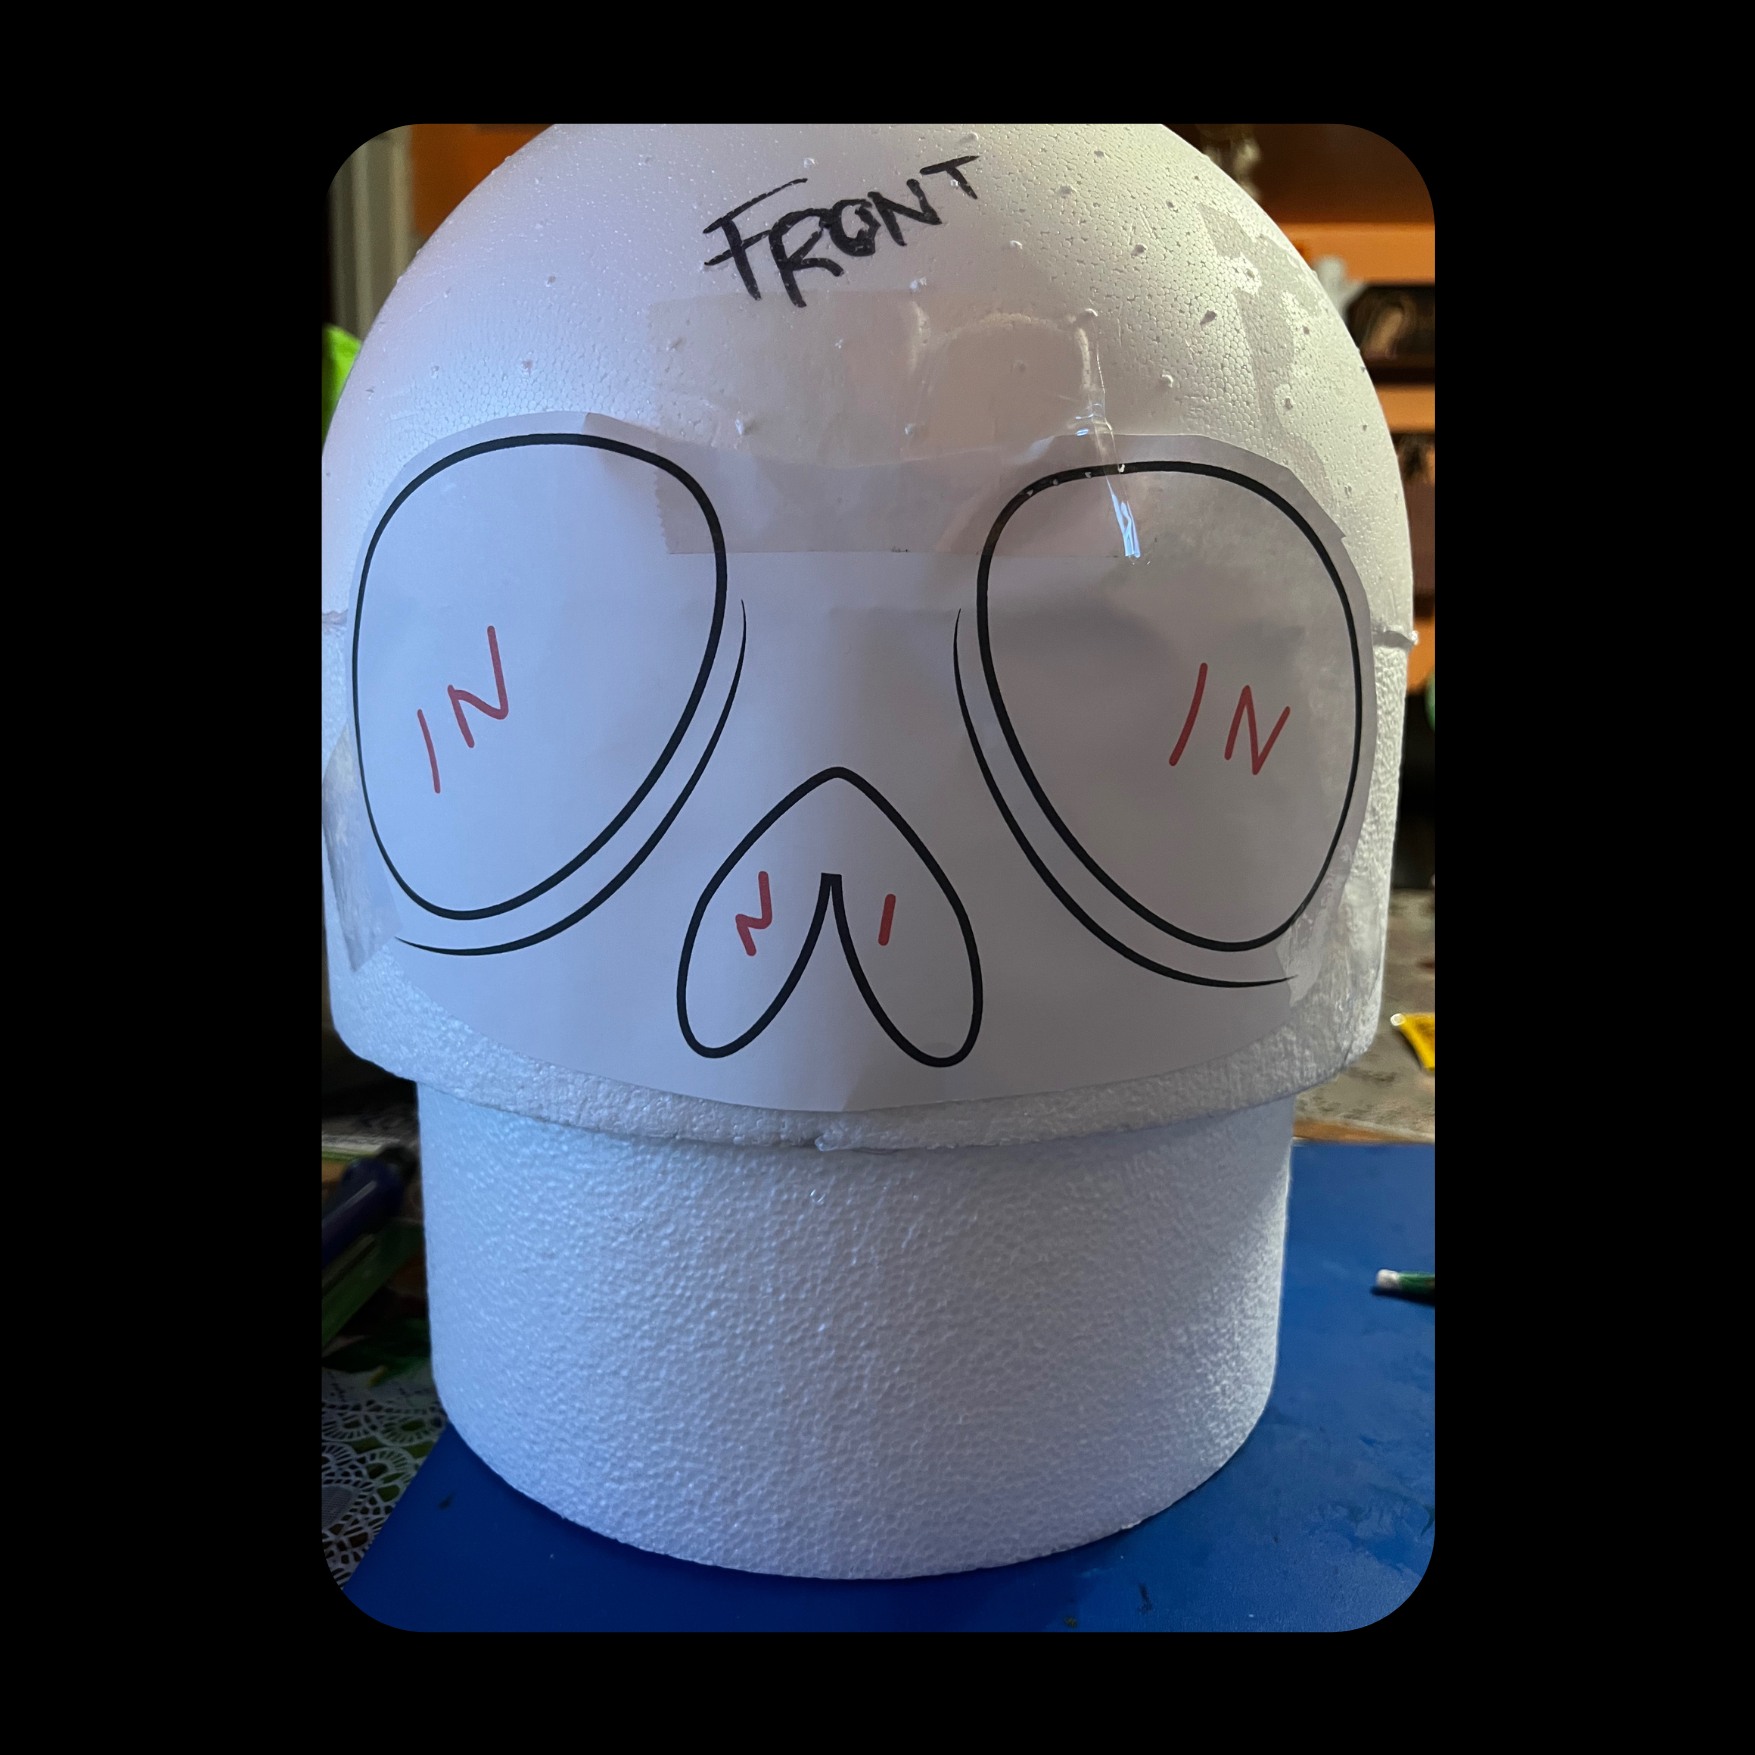
Phase 1:
Outline the skull face structure.
-
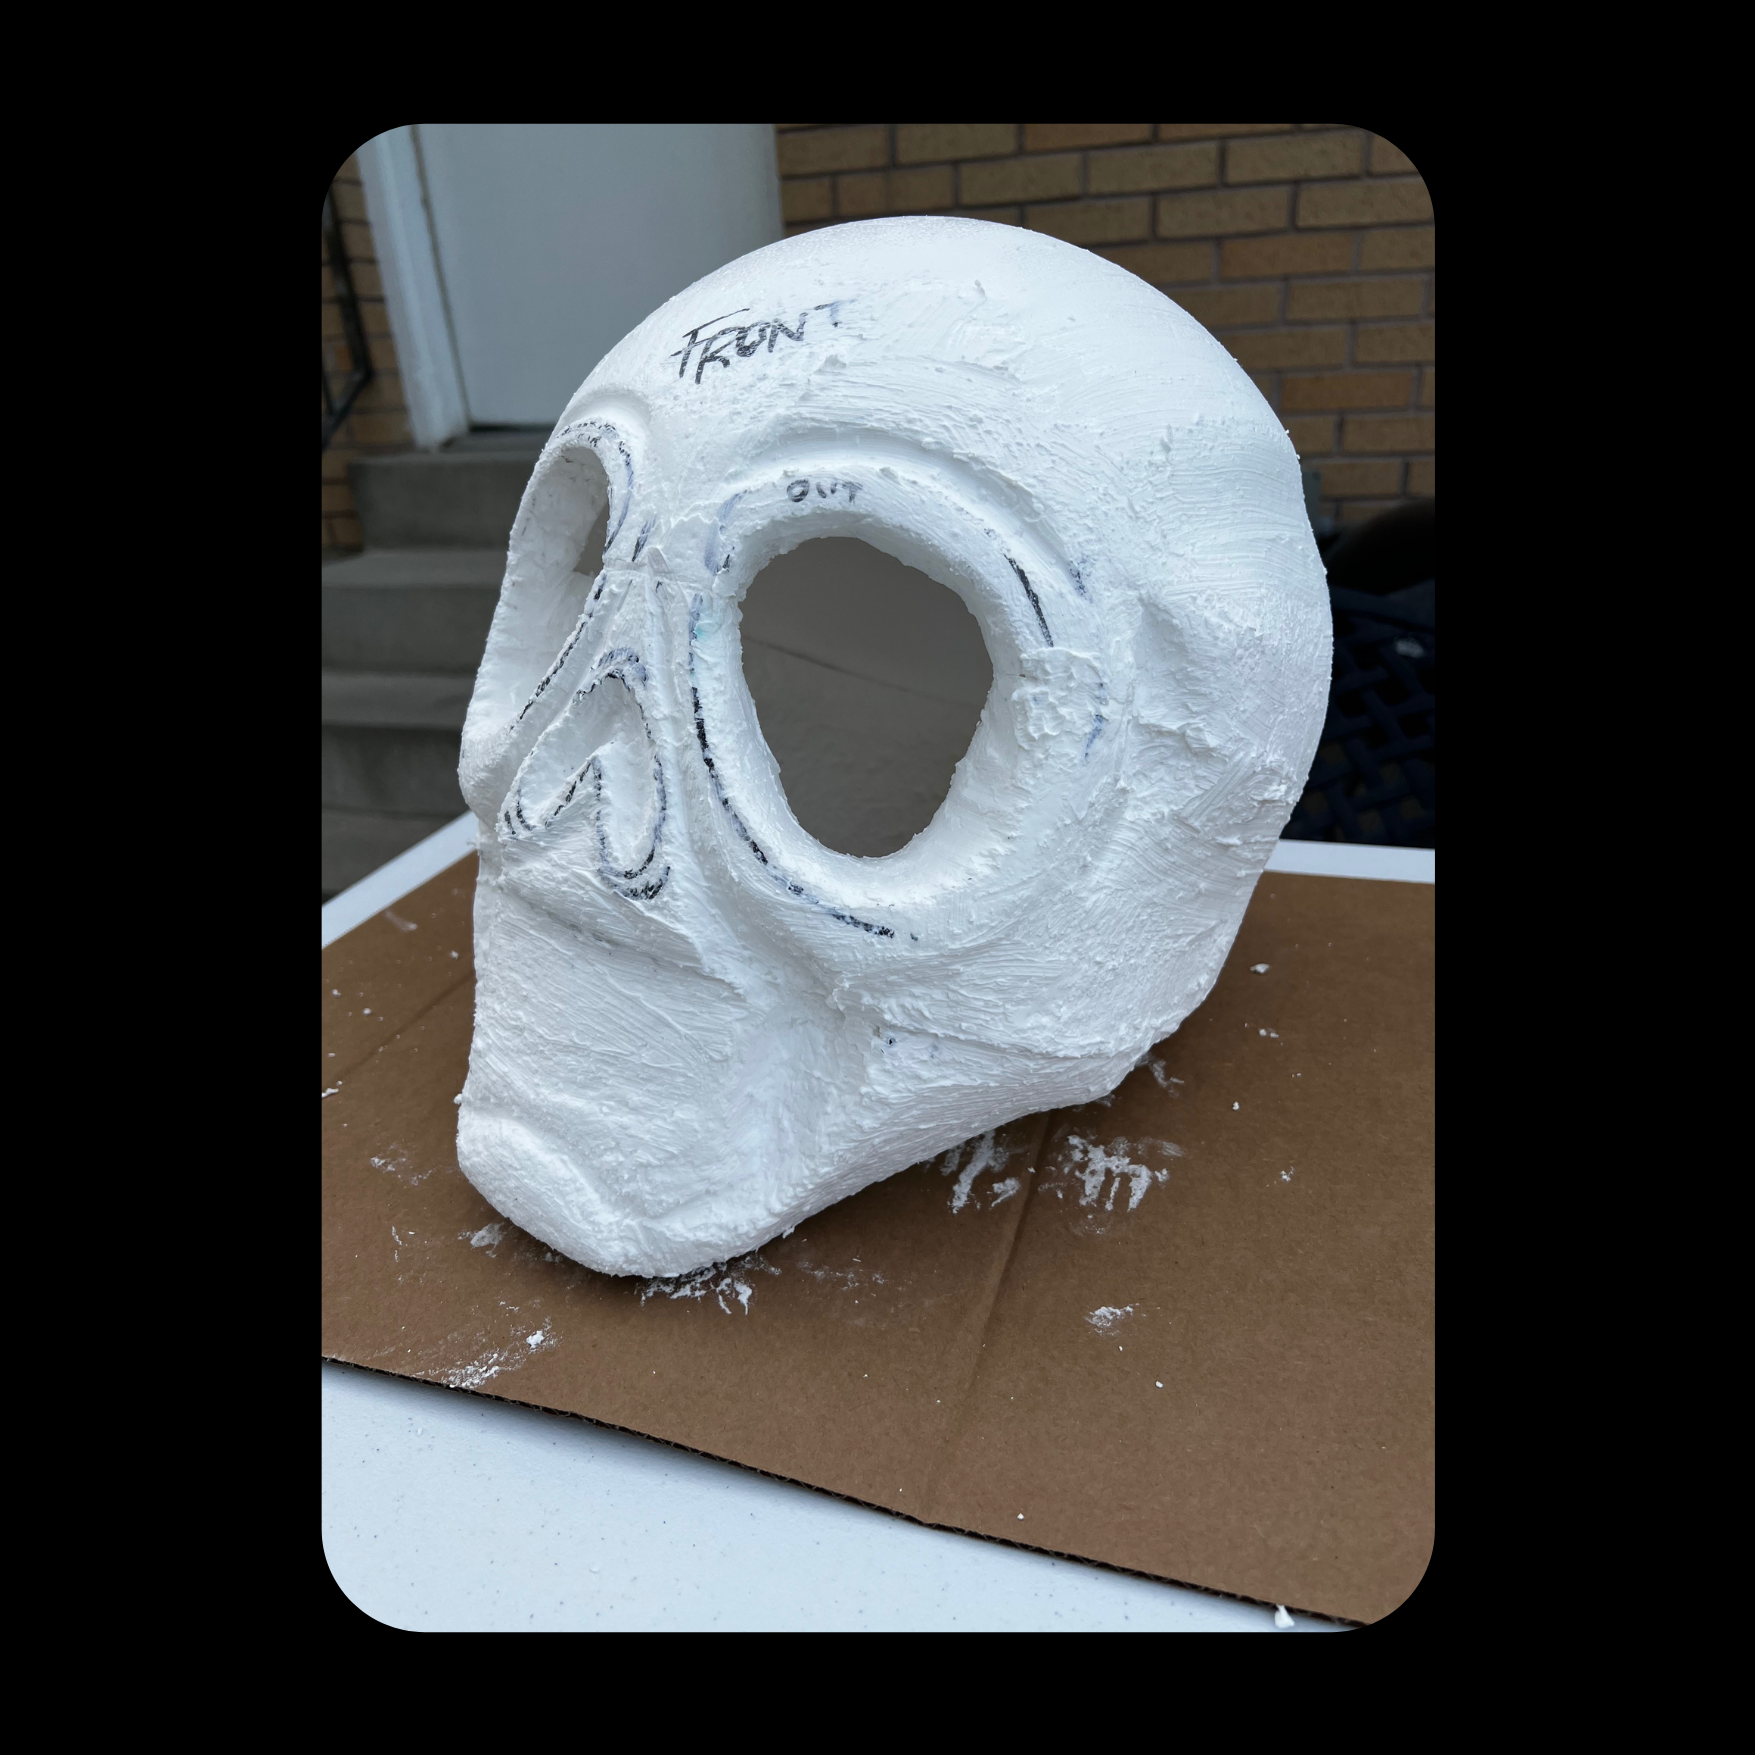
Phase 2:
Shape the skull face and sand it for a smooth finish.
-
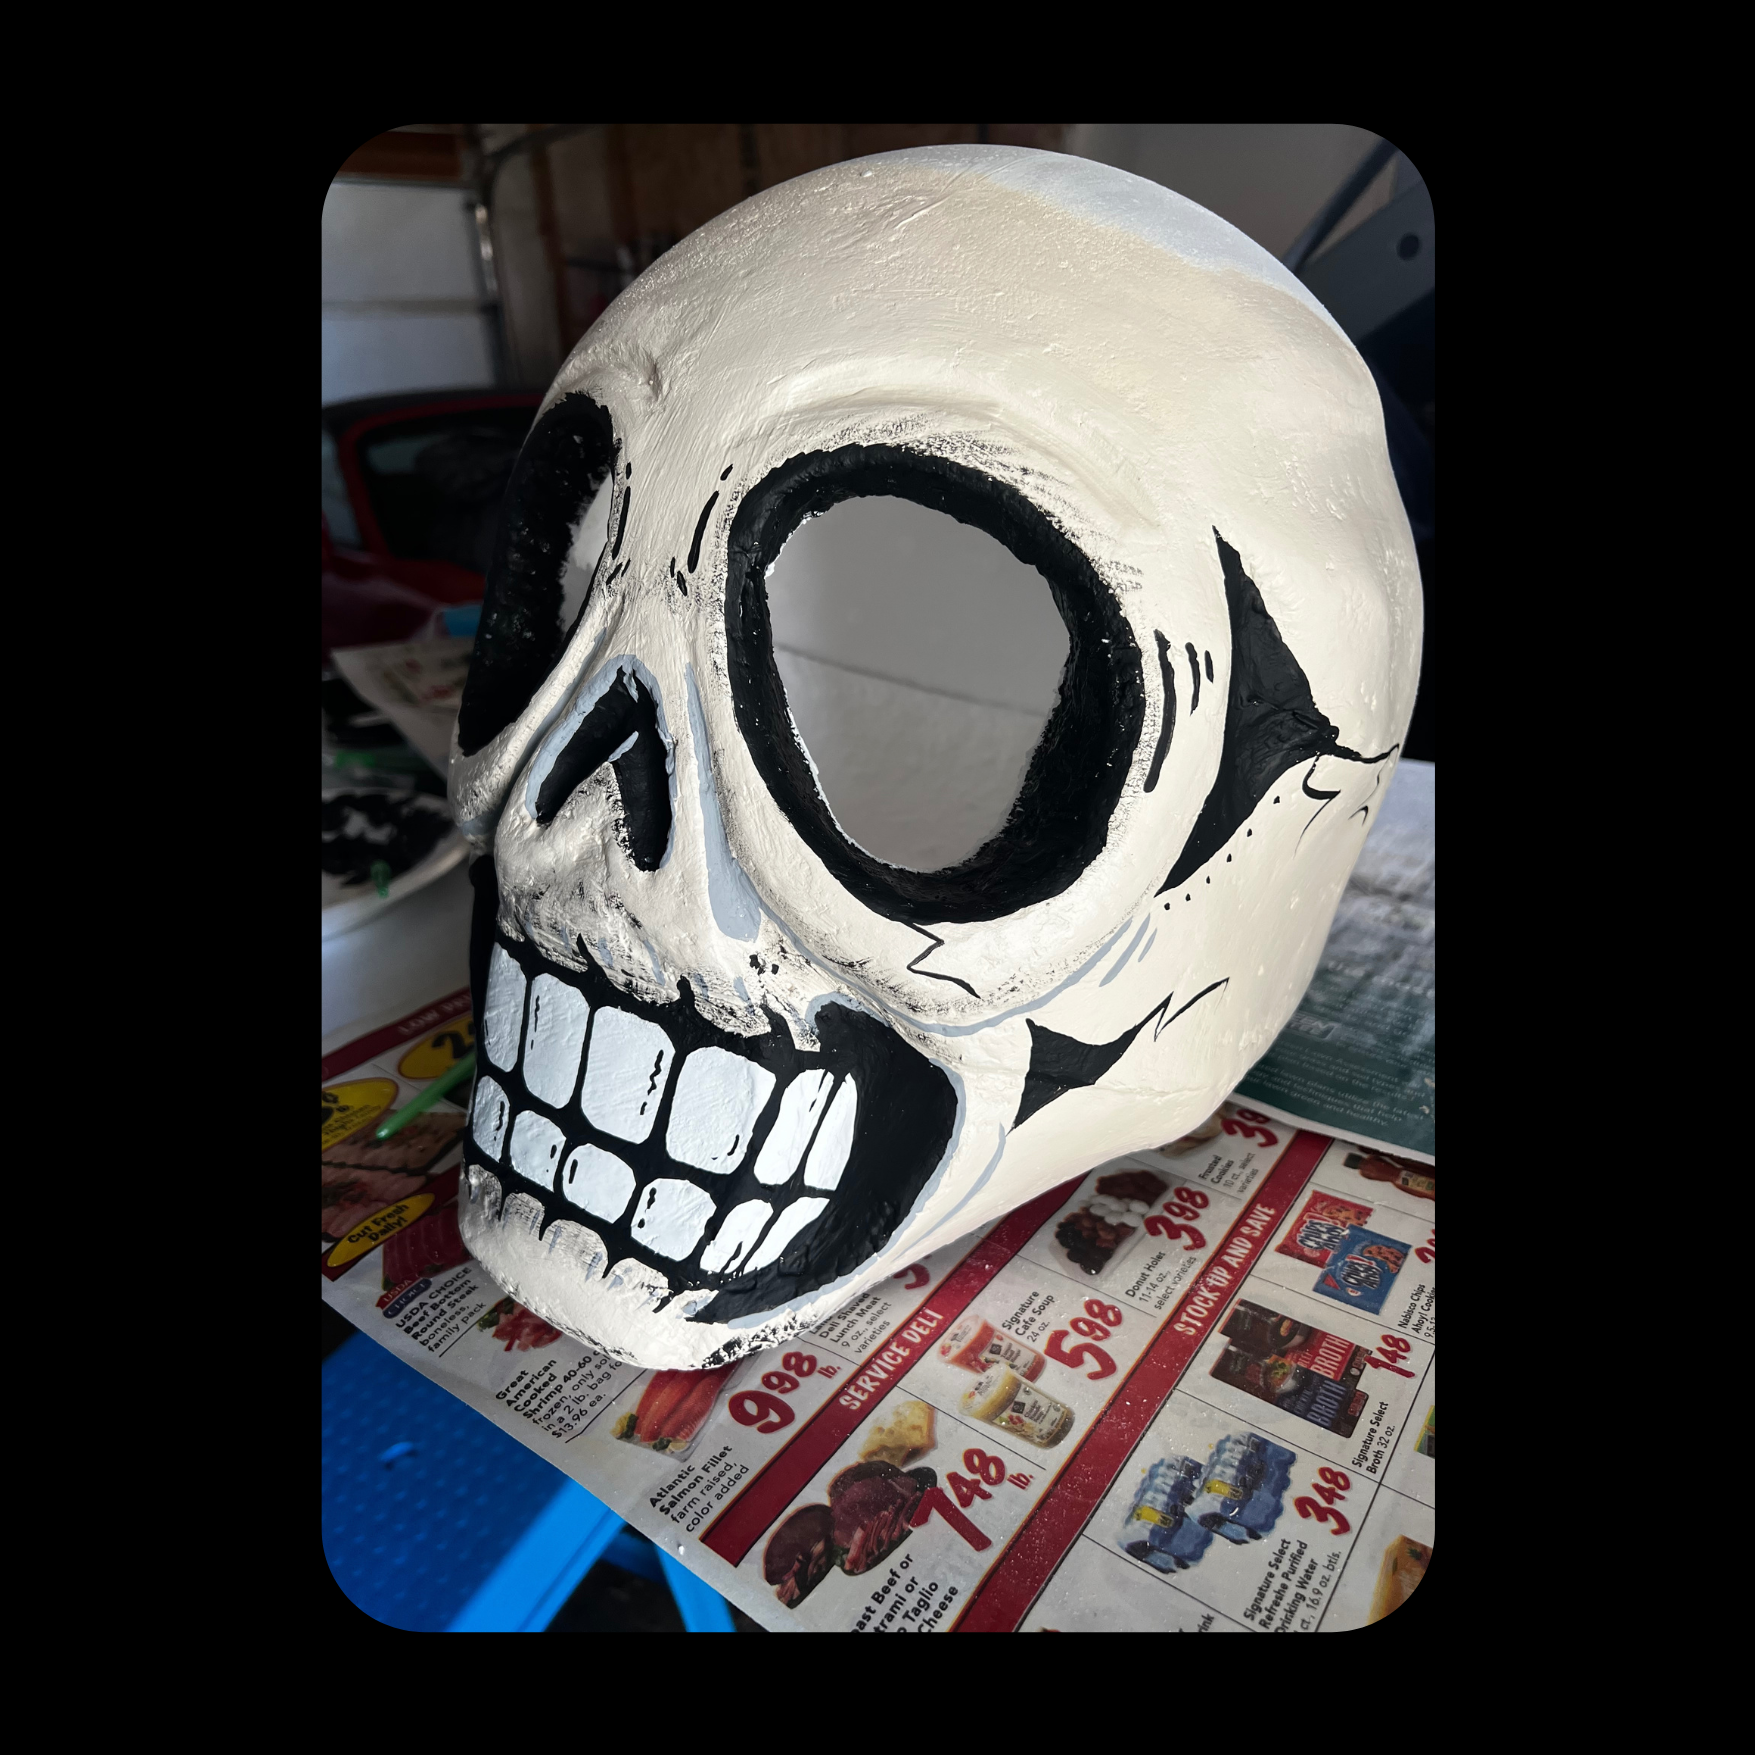
Phase 3:
Paint the skull face and add detailed accents.
-
Phase 4:
Attach fabric for the eyes and create the hair structure.

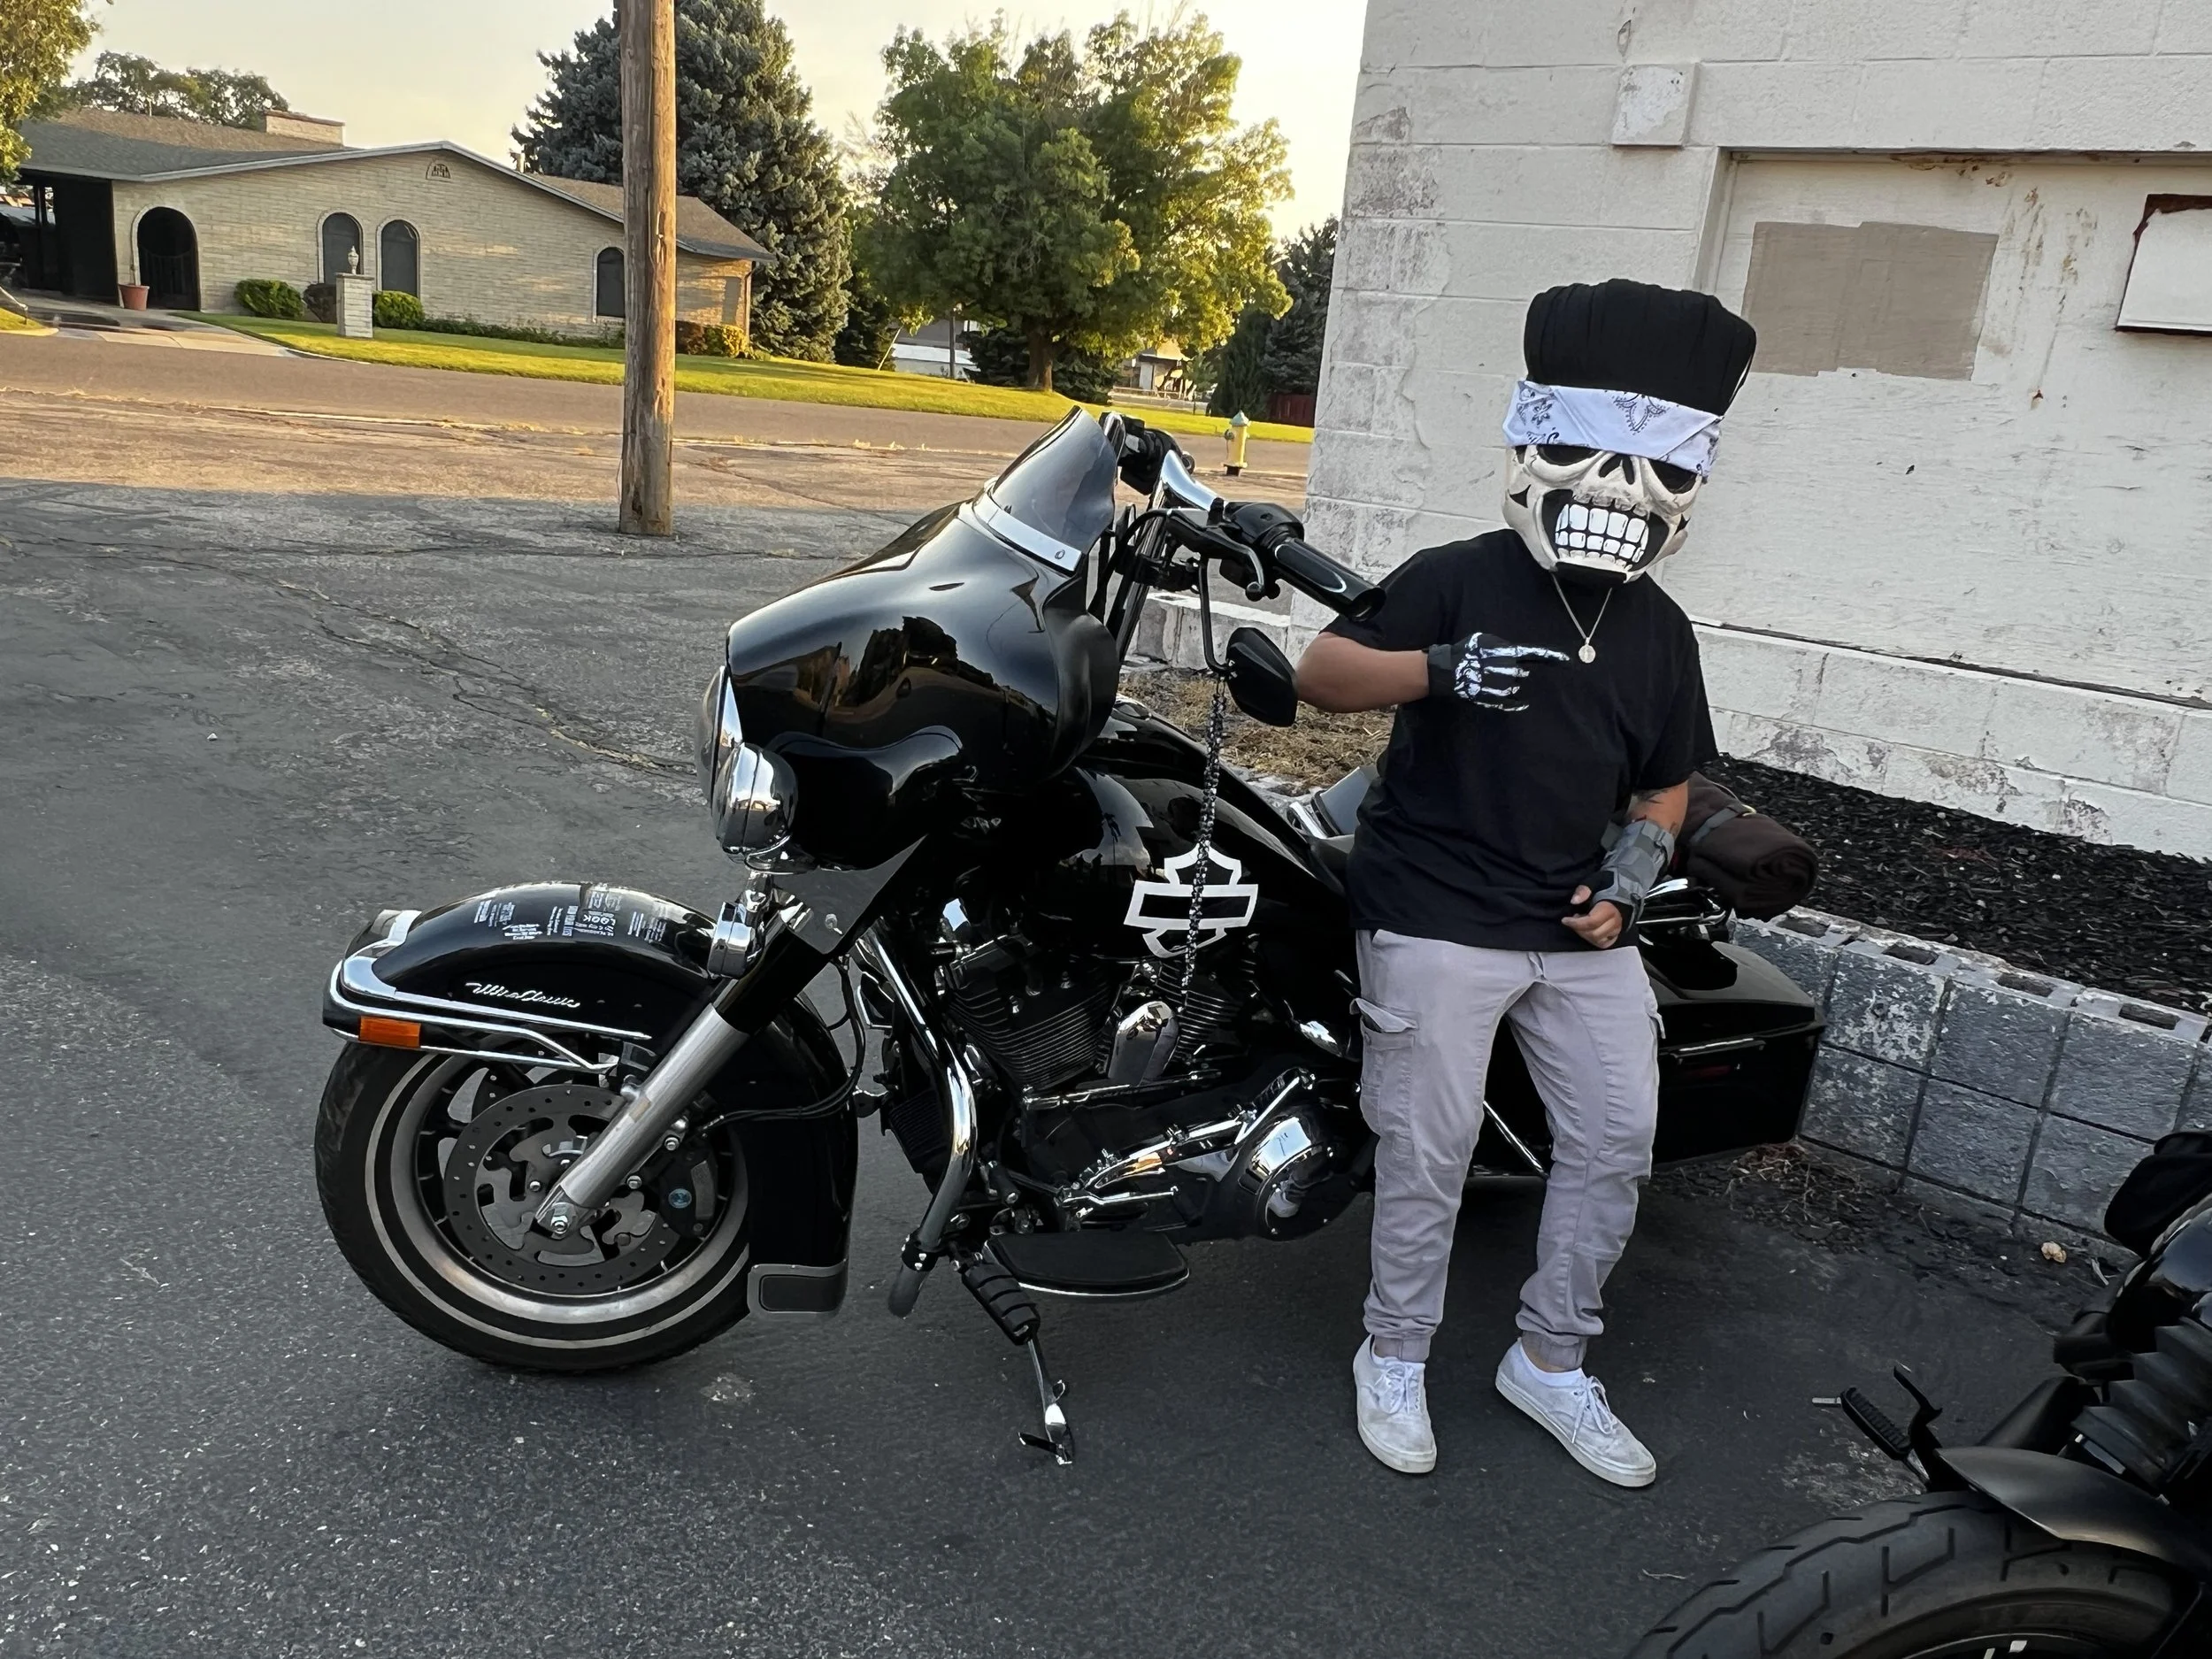
Now that you’ve seen the step-by-step creation process of Mr. Oldskool, I’d like to share the inspiration behind this character. My goal in creating Mr. Oldskool was to design a figure that exudes joy and a sense of cool, smooth vibes—someone who could bring a smile to your face every time you visit the Oldskool Artist booth.
Mr. Oldskool was envisioned as more than just a character; he’s a symbol of nostalgia and fun, giving visitors a chance to take memorable photos and cherish moments from the past. Crafting him has been one of my proudest achievements as an Oldskool Artist.
The project took about two weeks to complete, and every effort was worthwhile. My ultimate goal was simple: to create something that would spark happiness and leave a lasting impression on those who encounter Mr. Oldskool.